
7 Proven Steps to Deep Clean Your Fridge and Save Time and Money

Why a Clean Fridge Is Worth the Effort
Ah, the fridge—a true unsung hero in the kitchen. It keeps our food fresh, our leftovers safe, and our late-night snacks within reach. But let’s be honest, cleaning the fridge is one of those chores that’s easy to put off. We’ve all been there—opening the fridge only to be greeted by a whiff of something mysterious or the sight of something that used to be food but now looks like a science experiment!
But here’s the thing—a clean fridge isn’t just about looking good; it’s about keeping your food safe, saving money, and avoiding waste. When your fridge is clean and organised, you’ll know exactly what’s in there. When we lean into active food management, we can use things up before they go bad, which is great for bring down our food bill. Plus, who doesn’t love opening a sparkling clean fridge? Let’s dive into how you can make this often-overlooked chore a breeze!
Step 1: Empty and inspect your fridge

First things first, take everything out of your fridge. Yup, every last jar and bottle! It’s a great chance to check what’s still good and what’s past its prime. Have some items sneaking up on their expiration date? Plan to use those in the next few days to avoid wasting them. And while you’re at it, give those jars and bottles a good wipe down to tackle any sticky spills.
Maintenance Tip: Make it a habit to give your fridge a quick once-over every week – extra points if you tie it in with your food shopping and list making. It helps you stay on top of expiration dates, keeps things tidy and reduces your food bill.
Step 2: Clean the Removable Parts
Next, remove all the shelves, door compartments, and produce bins. These parts can get pretty grimy with everyday use. Give them a hot, soapy wash (castile soap is great here), rinse thoroughly, and then let them air dry. Don’t forget to tackle those awkward corners and edges where gunk likes to hide!
Double check your fridge’s manual before you start dismantling things. It’s always good to know how everything fits back together. If you can’t find your manual a quick google search of your make and model should help!
Step 3: Tackle the Inside
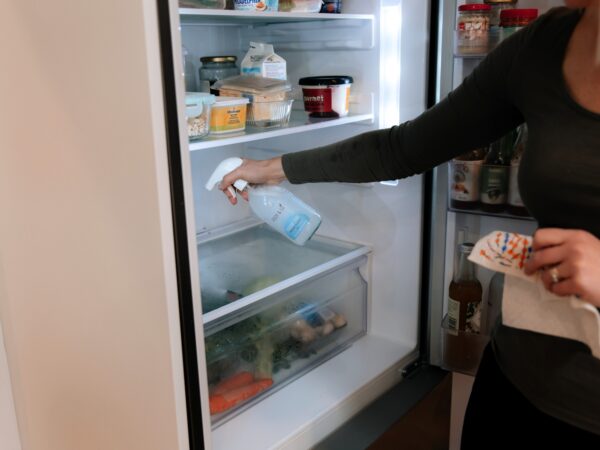
Now that your fridge is empty, it’s time to clean the inside. Because this is where we are storing our food, using non-toxic and low fragrance cleaners is a no brainer. Use Figgy Everyday Spray or hot soapy water using castile soap to thoroughly wipe down all the surfaces. Pay special attention to the seals—sticky bits tend to cling to them. If you encounter some stubborn spots, give them a spray and let it sit for a moment before wiping clean. This little trick makes removing stuck-on messes so much easier!
Step 4: Don’t forget those Hidden Spots
While your fridge is pulled out and empty, take advantage of the opportunity to clean underneath it. If you can, check the drip tray at the back—stagnant water can lead to algae growth, and nobody wants that! Also, have a look at your cooling fins; they are the vertical metal lines, this is where the cold gets made to keep your food fresh. If they’re dusty, give them a gentle clean with the brush attachment of your vacuum – when they are free from dust the work more efficiently.
Step 5: Reorganise and Reassemble
Before putting everything back, think about how your fridge is organised. Is your current layout working for you? Maybe it’s time to designate a shelf just for leftovers at eye level so you have the visual reminder to use them up. Or put kid-friendly snacks in the door for easy access – and less asking…. Mum, can you get me a snack? If you have a water dispenser, now’s a good time to check if the filter needs replacing. Once you’re happy with the setup, replace the shelves, door compartments, and produce bins.
Organisation Tip: Store frequently used items in easy-to-reach spots and group similar items together. It’ll save you time and make everything easier to find. You might find fruit works better in an open storage container. Plan to minimise mess going forward – especially butter and deli meats. Store these so they don’t drip or smear mess.
Step 6: Don’t Forget the Exterior
Finally, give the outside of your fridge a good wipe down, including the top and at floor level. If it’s particularly dusty, a quick spray with Everyday spray and wait will make cleaning much easier. If your fridge is stainless steel, mix vinegar with water (50/50) in a spray bottle and use it to give the surface a nice shine. Using an ultra absorbent, streak free cloth will make a big difference to the final finish, check out our reusable Figgy Eco cloths.
Bonus Step: Tackle the Freezer
If you’re on a roll, why not tackle the freezer, too? A good defrost can make your fridge and freezer run more efficiently and make more room for all those frozen goodies. For this you will need to empty your freezer and keep the food chilled.
Turn off your freezer power and let the ice start to melt – a hair dryer can be helpful to speed this up. You may want to put some old towels down to catch any loose ice that will quickly melt into a puddle on the floor.
Once it starts to melt at the edges, use a blunt tool or the defrost tool that came with your freezer to help lift away the ice. Avoid using sharp knives and the like to pry off the ice – you run the risk of damaging the inside wall of your freezer and exposing the internal insulation which would affect its water tightness.
Once all the ice is safely removed, refill and organised your freezer in a similar way to your fridge with like items together and food to be used up first in easy reach.
And there you have it! A clean fridge (and freezer) that’s not only more pleasant to open but also better for your food and your wallet. Happy cleaning!
Get natural cleaning tips from our blog!
We want you to have everything you need to clean your home healthier while avoiding unwanted chemicals – and looking out for the planet too! Take a browse through our blog and learn more about natural cleaning, safe ingredients and so much more!