How to clean shower mould without harsh chemicals
Say good-bye to shower mould, your natural cleaning guide is here!
Picture this: You step into your shower, expecting a refreshing oasis, but alas, there it is again—stubborn, sneaky mould lurking in the corners, playing hide-and-seek. Gross!
A clean, sparkly shower is so nice! But the shower cleaning can be a drag. It’s fussy & awkward with all that splashing, and with typical bathroom cleaners often there’s spell of half choking on fumes….. then throw in some grotty mould and it’s UUUGH!
Let’s change that. We’ve the ultimate trick up our sleeves to bid adieu to that pesky mould without a single coughing fit from harsh cleaning fumes!
This shower cleaning guide is a step by step how to clean, treat and prevent shower mould without harsh chemicals. You’re going to be happy with the results and how no-fuss it is! We’ll tackle this job with just the right non-toxic cleaners so you’ll find the cleaning easy and enjoyable.
Reach for cleaners with ingredients you know and trust
Why should you embrace non-toxic cleaners for banishing mould? Firstly, there’s only benefits to be had from using cleaners that are free from harmful chemicals, protecting both you and the environment. Secondly, these natural cleaning allies are the real deal, they do a brilliant job of banishing mould with no extra scrubbing. With their refreshing scents and gentle touch, cleaning might even become a joyful ritual, making your shower gleam and sparkle like never before. And so save time, when you ditch the nasties, you can clean the shower while you’re showering with a worry in the world! Who doesn’t love a bit of multitasking!
First you need to know what shower villain you’re up against!
Let’s start with the worst news, to keep mould at bay in your shower, you will need to clean regularly. Especially if you live in a humid spot or have a bathroom with not enough air flow. You know the saying a stitch in time saves nine…. more frequent cleaning will mean you wont need to do the very deep cleaning so often – if at all! When you’ve got mould growing, a deep clean to get rid of it is the goal, but blink for too long and it will be back. That’s part and parcel of being part of a living environment. Don’t think you’re not cleaning right, just know that mould will take an opportunity to start growing at any time. After all, mould is a formidable foe! It belongs to the Kingdom of Fungi, which is 100’s of millions of years old. Older than both plants and mammals and it absolutely has a trick or two up its sleeve about how to get growing again! It’s not you, it’s the mould!
Shower mould starts with tiny, microscopic spores that are everywhere and float in the air. These spores waft into our homes from outside, and settle on any surface (even just cleaned surfaces) – this in itself isn’t really a problem unless you have spore allergies. However, once settled, these spores just wait for the right conditions to start growing, and if inside your home suits it, this is where it will grow. Bathrooms and showers are just right.
With something to eat, moisture, some warmth and still air – the spores send out roots, then quickly grow into mould that we see. You can think of house mould like weeds popping in your garden – come spring with the right conditions – thousands of tiny weeds sprout from seeds that have sat there all winter!
The difference of growing on or into a surface is key
This bit is important.
To really hone in your mould busting shower cleaning, you need to know your surfaces to clean them best! Mould can grow on both porous or non porous surfaces. A non-porous surface like glass or metal are an impenetrable barrier, the mould will only grow on the outside surface of the material. However, a porous surface – like grout, silicone chalking or soft plastic is more of a honey comb, and allows the mould roots to grow actually into the substrate.
Mould growing on a non-porous surface is easy to clean and maintain. A porous surface on the other hand, needs a cleaning play book! Anytime mould grows into a substrate, the chance of being able to eliminate it becomes trickier. Of the porous surfaces, fabric shower curtains that can be washed or unsealed grout that will suck up water, are easier to clean. Substrates that repel water, like soft plastic splash guards and silicone chalking are the most difficult to eliminate inside mould growth from – once mould roots grow inside these substrates, any cleaning chemical – natural, toxic or other wise can’t follow. This is because they are water based and are repelled from soaking in and having any chance of reaching the mould deep inside. There are times when mouldy components simply need to be replaced with new.
Non porous surface
Mould growth on a non-porous surface, like an acrylic shower liner or glass just needs a good scrub! The action of the soapy wash and scrubbing will dislodge the mould and biofilm (see below). For a good scrub all you need to do is see that all the surfaces get washed from top to bottom including the corners where mould likes to lurk.
Porous surface
Mould growing on a porous surface like tile grout or soft plastic needs a good scrub like a non-porous surface. Often though, it will need further cleaning to target the deeper growing mould. If the mould hasn’t grown in too deep, applying a cleaner and letting it sit on the surface is enough to target the mould. However if the the mould has been there for longer, it would have grown deeper into the substrate than a cleaning agent is able to reach. In these cases the substrate will need to be replaced in order to remove the mould. Stink, but true.
Successful mould cleaning is about getting disruptive!
The first step to stop sneaky mould from lurking is to get in there and disrupt the mould growth. It’s very much like weeding a garden. Baby weeds are much easier to deal with than big weeds that have taken hold!
Mould likes to grow on biofilm
Biofilm is food for mould. Biofilm is the grimy build up your shower gets with use. It’s a mix of body oils (and pee), water minerals and personal care products like shampoo that stick to shower walls, glass, and curtains and build up over time. Because water drips downwards, it especially builds up on the bottom half of the shower and in corners and under joins. Keeping your shower mould free starts with taking away its food, and that is as simple as regularly cleaning away biofilm build up!
Let’s start by cleaning away the mould that’s ruining your relaxing oasis
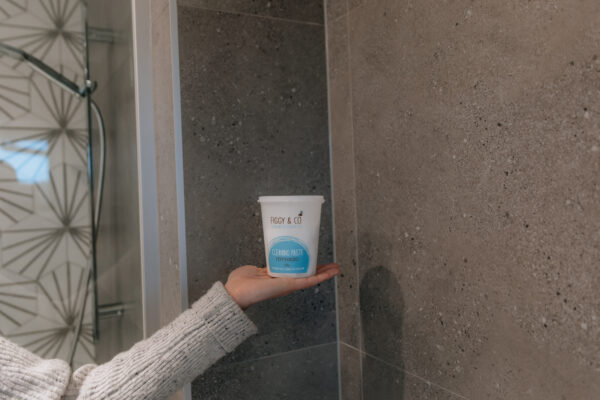
- Grab a regular scrubbing brush and either Figgy & Co. home cleaning castile soap or Figgy cleaning paste and start cleaning from the top of your shower to bottom. Soap is safe for you and waterway friendly, it works by making the surface slippery & dislodging grime and mould, so that it can be rinsed away. If there is a build up of biofilm, use a cleaning product that has some scrub like Figgy cleaning paste. It’s a scrub cleaner combining soap and baking soda with essential oils. Baking soda scrubs perfectly, it’s non-toxic & fine enough to not scratch, it does a great job of removing even the most stuck on grime.
- Choose the right brush: If you have tiles, use a specific grout brush with the castile soap or cleaning paste to scrub the grout. Grout brushes are smaller and have thicker, stiffer bristles for a deeper scrub. An alternative is a denture toothbrush from the supermarket. Some people even use an old electric toothbrush! With an acrylic shower liner that has a bottom edge, use a regular old toothbrush with softer bristles to get into this gap.
- Safety first. Use a towel on the floor of the shower to stop the floor getting slippery under foot!
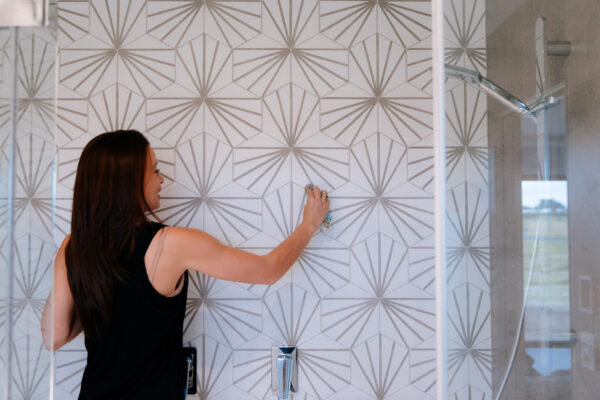
- Start washing the shower with your Castile soap or cleaning paste. Wash from top to bottom. I tend to clean all of the top half of the shower then move to scrubbing the bottom. If you have a lot of build up use the cleaning paste, scrub up all over and then leave it for 30mins or so, scrub again and rinse.
- Shower doors are brilliant at growing gunk in the gaps and grooves where the water settles. Use your old toothbrush here, or grab the brush that comes in a reusable straw pack, these are great for getting along shower tracks (obviously, this is now a cleaning brush!)
- If you have a shower curtain – take this down and give it a hot wash if it’s fabric and a good wipe over if it’s plastic. The plastic curtains can be harder to maintain but do your best to give it a scrub by laying it out in the bath if you have one.
- Now for the drain – if your shower has a removable drain you’ll know just how feral these can get with a build up of hair and bio sludge. These drains can be a reservoir for mould to grow from. Take the drain apart and soak the parts in half a bucket of hot water with 1 tablespoon castile soap and two tablespoons washing soda. After soaking for 20mins or so, give the parts a good scrub and rinse.
I’ve cleaned but I can still see mould – Help!
After a good scrub, you might notice some stubborn mould on the silicone bead or tile grout. This is where the mould has grown into a porous surface and can’t be washed away with just a scrub over. Mould growth can highly pigmented, that’s the black spots you see and its unsightly. Even if you are now keeping up with shower cleaning – it’s often nice to get everything looking back to fresh and so this deeper mould needs to be targeted.

Deep mould cleaning options
- Make an oxygen bleach solution with 60g oxygen bleach dissolved into 1L hot water out of the tap. Oxygen bleach is the dry powdered form of hydrogen peroxide – It’s great at removing stains. Decant your oxygen bleach solution into a spray bottle, spray this onto the areas where the mould staining is noticeable. You want a good covering and the leave the oxygen bleach on the surface for at least 2 hours. Respray if needed to keep the surface coated.
- Shower curtains, after washing, can also be soaked in oxygen bleach too. Use the same concentration as above and soak for at least 2 hours or overnight.
- Re-chalking silicone is often a good choice when mould has been running amok. It is not unusual for even the harshest cleaners to not get all the mould out, and for it to simply grow again. There are plenty of DIY videos on you tube for you to give it a go yourself if you want to keep the cost down.
Should you use Chlorine bleach?
Now this next bit might surprise you (!) as Chlorine bleach certainly is not a non-toxic cleaning chemical*. However, while it isn’t a product you would want to use regularly, in fact it should really only be used infrequently for specific cleaning tasks due to the health concerns of exposure – it may prove useful in restoring your shower silicone to white, for you to then continue on regular shower cleaning using non-toxic, everyday cleaners.
Because the Chlorine is a stronger/harsher cleaner than oxygen bleach it may have the extra oomph to target mould that is just below the surface of your silicone. Bear in mind that chlorine bleach is also water based cleaner, if the mould has grown deep into a substrate that repels water – then even chorine bleach may not be able to reach the mould.
*Chlorine bleach is toxic and corrosive and so before use read instructions and ventilate the space – it is not appropriate to spray chlorine bleach based products in a small environment without PPE to protect your lungs.
How to use Chlorine bleach with your safety in mind
Chlorine bleach attacks living cells & breaks down colour at a molecular level – it is effective at killing moulds and depigmenting colour. For this to be effective the chlorine needs to has sufficient contact time on the surface being cleaned. Aim for 15-30 minutes exposure time. Repeat if needed. Place a handy towel ripped into strips along the area to be bleached and soak with the chlorine bleach. This ensures good contact. Use the smallest amount of bleach required for the job. Treat only the areas that have had a good scrub, as biofilm will deactivate chlorine bleach. Don’t spray the bleach if you can avoid it and open windows, turn on the fan and close your bathroom door to contain the chlorine gas. Remember to wash your hands also as bleach will damage your skin.
Remember mould spores are everywhere, all the time.
Doing a big clean up of your shower to remove mould growth really is just a moment in time. Even as you are standing back to enjoy your handy work, mould spores are floating in the air looking for the perfect place to grow! This is where the upkeep comes in. Regular cleaning, which only needs to be a soapy scrub over, is the ace up your sleeve. All you need to remember, especially when mould is growing easily during winter, is a regular, quick scrub is going to ‘weed the garden’ and stop mould from taking hold. Be sure to clean and disrupt the areas you know mould likes to lurk!
six Tips to keep mould from growing back.
1. Disrupt the growth cycle!
Wash down your shower space regularly with soap and water or cleaning paste to keep biofilm at bay. Do this before you see mould growing. Pay special attention to the bottom of your shower walls and in the corners and where water pools. This might mean you clean more often during the time of the year when your shower is prone to mould growth. If you have a shower curtain, use hooks that make taking it down for regular washing easy. Keep up regular cleaning by stashing cleaning supplies in the bathroom.
2. Tea tree oil and white vinegar
Tea tree oil has been found to be very effected in killing mould and preventing fresh spores from sprouting. Vinegar has also been found to be useful in killing certain moulds, while different strength acetic acid was found to be effective the best was a 6% acetic acid solution left on the surface for 30minutes. Harness the power of both by making a disinfecting spray with 300ml Figgy strong white vinegar and 200ml water with 20 drops Tea tree oil. Shake before spraying.
3. Tea tree oil and castile soap
Another way to use Tea tree essential oil is to mix it with the soap you use for cleaning your shower, allowing the bubbles to stay of the surface for a time before rinsing away. Add 20 drops of oil to 50ml of Figgy home cleaning castile soap.
4. Shower dry off
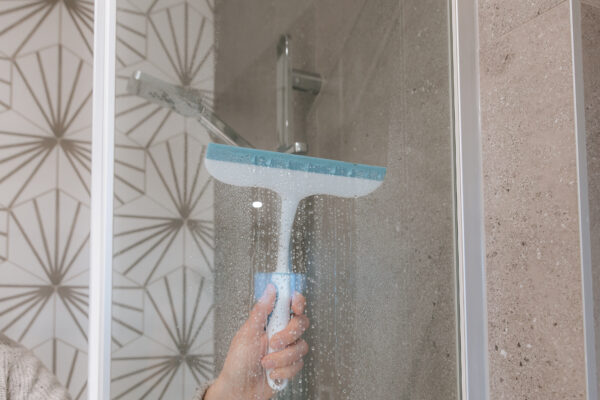
After showering, use a squeegee or towel to dry down the shower. Pull shower curtains open to get air and dry. The drier the shower is the less likely the mould will grow – mould needs moisture to grow.
5. Ventilation is king
Ventilate, ventilate, ventilate. Open a window or use an extractor fan with sufficient suck to quickly exchange damp air for fresh dry air. In order for an extractor fan to work, it needs to be able to draw air in. Leave a window open on a crack or the door open a little so the new air can enter the bathroom.
6. Minimise sitting water
Have a clear out – shampoo bottles and the like collect water when they sit on the shower floor. This encourages mould to grow. Either remove containers from the shower or have them on a surface that drains.

A final note about cleaning mould
This cleaning guide is about getting rid of small amounts of mould in your shower. Any mould growing in your home is bad for your health, so it is always best to keep up with cleaning in places that you find mould grows readily. Mould releases toxins & it’s tiny spores float in the air and are inhaled deep into our lungs – there they can cause infection, breathing problems, allergies and overall unwellness. For these reasons you need to be careful when cleaning up mould. If you have larger amount of mould, 10m2, then consult a specialised mould cleaning service as they will also advise on if the mould can be successfully cleared and what personal protection equipment you will need to stay safe from the air borne toxins.
Get natural cleaning tips from our blog!
We want you to have everything you need to clean your home healthier while avoiding unwanted chemicals – and looking out for the planet too! Take a browse through our blog and learn more about natural cleaning, safe ingredients and so much more!
