How to clean your shower & keep it clean! Deep Cleaning + Removing Water Spots


Let's Deep Clean Your Shower Without choking on Fumes and Keep it Clean For Longer
Alright, let’s face it—cleaning the shower isn’t anyone’s dream weekend activity - and we all know why. The fumes in typical shower cleaners are next level - causing us to choke and splutter. Gross! These cleaner come with some serious health risks, to our lungs especially and our waterways. But when it comes to cleaning, we don't want you to miss out, because there’s something pretty satisfying about stepping into a shower that’s squeaky clean with crystal clear glass. You know the feeling when the water just slides off the glass like you’re in a fancy hotel? It’s a little victory, right? So why not make this chore a bit of fun (yes, fun!) and tackle it the Figgy & Co. way—with natural, non-tox solutions that are as kind to you & your home as they are to the planet. Let's get into it!
How to Clean the Inside of Your Shower
1. Gather Your Shower Cleaning Supplies
First things first—get your non-tox gear sorted. You’ll need a good scrubbing brush and either Figgy & Co. Home Cleaning Castile Soap or our Cleaning Paste. Castile soap is brilliant for making surfaces slippery, so the muck just slides right off, and our cleaning paste adds scrubbing power that can tackle the biggest of messes, with baking soda and essential oils to tackle those stubborn bits.
2. Safety First - don't slip
Before you get your scrub on, pop a towel on the floor of the shower. This little trick will help keep things from getting slippery—last thing you need is to take a tumble while you’re on a cleaning mission!
3. Shower Cleaning without the Fumes
Start at the top and work your way down. This way, any grime gets washed down to areas you haven’t cleaned yet. Use your castile soap or cleaning paste, focusing on those grimy bits. Got some serious build-up? Apply the paste, give it a good scrub, then leave it for about 30 minutes to work its magic before scrubbing again and rinsing.
4. Clean the Grooves and Gaps
Shower doors are a haven for all sorts of gunk—blame it on the grooves! Grab that old toothbrush or a brush from a reusable straw cleaning pack to get into those tight spots. And remember if you grabbed a straw cleaning brush, it’s now a house work cleaning brush only
How to Clean Shower Glass & Remove Water Marks
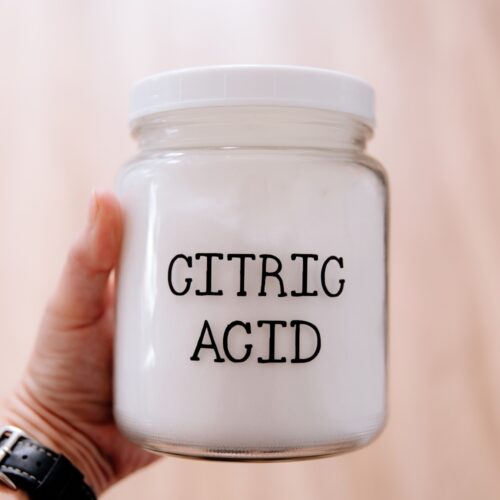
Ah, the never-ending battle with shower glass! Water spots and mineral stains can feel like a real buzzkill, but don’t worry—we’ve got a fuss-free, non-tox trick to remove the hard water minerals & get that glass shining again! Cleaning shower glass fogged up water marks with citric acid isn't new, it's the main ingredient in shower cleaners that target water marks - but by using just the active ingredient, you are reducing the chemicals in your cleaning routine. Win!
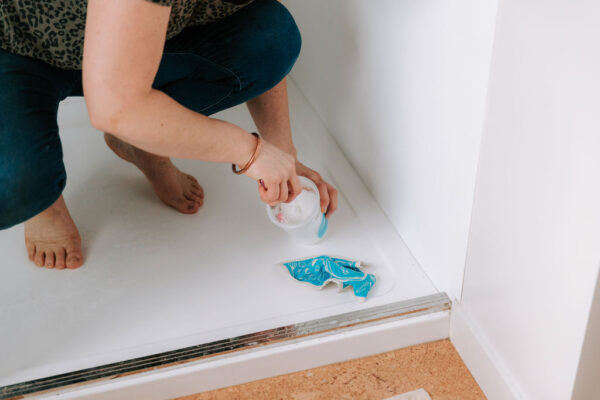
1. Make a Mineral Dissolving Cleaning Solution
Typically a 5% citric acid solution is strong enough, but you can use a 10% solution in very hard water areas or if your shower glass needs a strong treatment. For the 5% solution, dissolve 50g citric acid into 1L warm water. Pour this into a spray bottle. Warm water makes it easier to dissolve the citric acid.
2. Spray and Wait for the Minerals to Dissolve
Spray your pre cleaned shower glass with the citric acid treatment solution, then wait for 30+ minutes to let the acid dissolve the mineral deposits. You want to good covering on the areas you are treating so that might mean you need to come back after 10-15 minute and spray a little more.
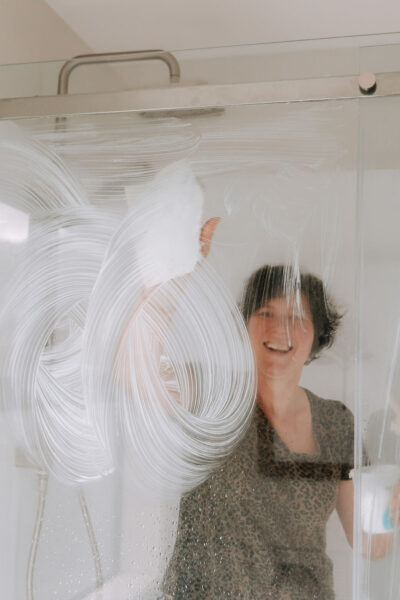
3. Scrub and Rinse the Shower Glass
Use a stiff brush or non-scratch pad to scrub the glass to help the minerals to lift away. You want to use a scubby that is specifically for glass, you can find these at the hardware store in the paint prep section. Rinse thoroughly with water and use a squeegee to remove any excess water. Check your work, and repeat as necessary to target any remaining spots. Note: This is a strong acid cleaner, avoid grout, natural stone and acid sensitive surfaces as overtime you will get surface pitting.
4. Outside the Shower Door
On the outside of your shower door a quick freshen up with a spray of diluted vinegar (equal parts water and vinegar) as mineral build up should not be a problem here. Use a lint free cloth or newspaper to buff dry.
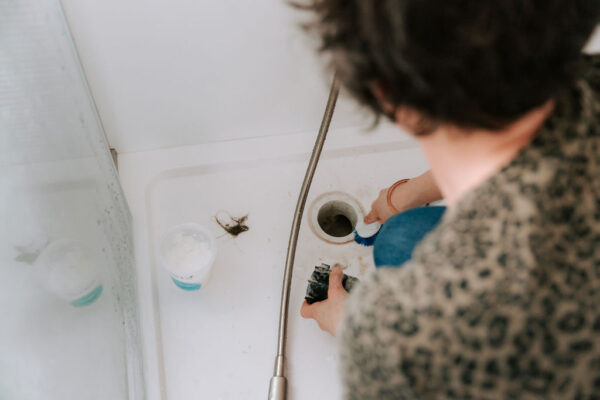
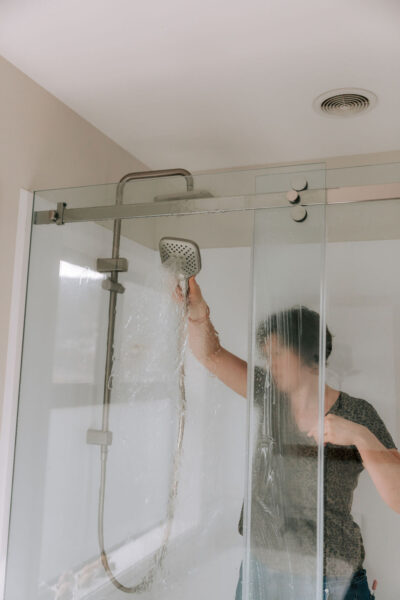
How to remove minerals from a Shower Head
Water minerals don't just deposit on your shower glass. Your shower head can get a bit clogged up with mineral deposits and grime too. Over time limescale builds up in the nozzles affecting water flow or stopping it completely. Here’s how to unblock your shower head nozzles:
1. Soak to Dissolve the Minerals
Fill a plastic bag with white vinegar or use the 5% citric acid solution above and secure it around your shower head with a rubber band. Let it soak for a few hours to dissolve all that build-up.
2. Scrub and Rinse
Once it’s had a good soak, take off the bag and use a brush or an old toothbrush to scrub away any remaining deposits. Rinse thoroughly with warm water, and your shower head will be good as new!
3. Regular Maintenance of your Shower Head
Give your shower head a soak every few months, especially if you’re in a hard water area. It keeps the water flowing nicely and prevents build-up.
How to Clean Shower Grout
Grout is one of those spots that loves to hold onto grime and mould. Here’s how to keep it fresh using the Hydrogen Peroxide from Oxygen bleach. After a deep clean, keep your grout fresh and easier to clean next time, remember to have your grout sealed yearly.
1. Choose the Right Grout Brush
A grout brush, denture toothbrush, or an old electric toothbrush will do the trick. You want something that will give a good amount of scrub and get into those grout lines.
2. Scrub with Soap or Cleaning Paste
Grab an old toothbrush or a grout brush and some Figgy Cleaning Paste or Castile Soap and give those grout lines a good scrub. Focus on areas that are looking a bit grimy or mouldy.
3. Rinse and Treat
After scrubbing, rinse off the grout, then spray it with your stain busting solution. Make this by dissolving ¼ cup Laundry Soaker or 2 tablespoons of Oxygen Bleach in 500ml of warm water. Use this in a spray bottle to apply to the grout. Hydrogen peroxide is an oxi active green bleach and takes time to work. Once all the grout is sprayed let it sit for a few hours to break down any remaining dirt. You may see it bubbling - that is the oxi action at work.
4. Scrub Again and Rinse
After letting the solution sit, scrub the grout lines again and rinse thoroughly. Keeping up with this routine will keep your grout looking fresh and prevent mould growth.
Final Touch: Clean the Shower Drain
Let’s not forget about the drain—the most overlooked part of shower cleaning. Here’s how to tackle it: 1. Remove Hair and Debris If you have a shower trap that is removeable, and it is all kinds of gross. Soak it in bucket of 1/2 cup washing soda and hot water for a hour. the washing soda will help break down the biofilm that has accumulated meaning there will be less hands on cleaning for this part! Next pull out any trapped hair and gunk. It’s not the nicest job, but it’s gotta be done to keep your shower drain flowing freely - go ahead and give all parts a scrub with cleaning paste or castile soap. 2. Clean with Washing Soda and Vinegar If deeper down your drain you have some odours to treat use this method to help clear them. Do this last as the cleaning solution needs to stay in the drain. Start by boiling your kettle and then letting it cool a little. Pre-flush the drain with this just boiled water - but reserve about 200ml. Use this left over hot water to dissolve ½ cup of Washing Soda and pour this down the drain. Let it sit for an hour, then pour in ½ cup of undiluted Figgy Vinegar to get everything fizzing away. Use a cloth to force the bubbles down. The washing soda will have softened built up grime and the vinegar reaction will help move it along. Repeat as necessary—drains are sneaky!
Dealing with Shower Mould? We’ve Got You Covered!
No one wants to see mould creeping into their shower. It's not only an eyesore but can also be a health concern if left untreated. Mould loves damp, warm environments—basically, your shower is its dream home! But don’t worry, we’ve got the scoop on how to kick it to the curb without resorting to harsh chemicals. If you’re dealing with mould in your shower, we’ve got a detailed guide just for you. Check out our blog on how to clean shower mould without harsh chemicals for step-by-step instructions on tackling that mould the natural way.
5 Top Tips for keeping Your Shower clean and fresh
Keeping a clean shower is all about regular maintenance. Here’s how to keep it looking fresh without spending hours on it:
- Keep it Simple: Clean while you’re in there! Cleaning your shower with castile soap or cleaning paste while you’re already in it is a brilliant time-saver and a bonus of using natural and non-toxic cleaners. No need to prep or change clothes—you’re already in your birthday suit!
- Wash away body oils: After each shower, turn the shower to its hottest setting and use the shower hose to wash down the walls, glass and base which helps remove soap scum, hair, and other debris.
- Blade off water: A quick wipe with a squeegee will remove excess water and not only prevent water spots but also mildew and mould from forming. Don’t forget to open a window or use a fan to reduce moisture in the bathroom. Keeping the shower door or curtain open after use also promotes airflow, helping surfaces dry faster and reducing the risk of mould.
- Weekly Wipe-Down: Once a week, do a bottom half, quick wipe-down of the surfaces with castile soap or cleaning paste. Concentrate your efforts where mould and gunk likes to form - in corners, door tracks and along the bottom edge of the wall liner. You can use vinegar diluted to clean the shower glass with a lint free cloth.
- Monthly Deep Clean: Set aside time each month to give your shower a deep clean, following the steps above. This will prevent major build-up and make each clean easier!
Why You Should Avoid Chemical Cleaners
We’ve all been there at some point in our lives—using those off-the-shelf shower cleaners that make your eyes water and your lungs burn! They might promise a sparkling shower, but they come with some serious downsides:
- Health Risks: Many chemical cleaners contain toxic ingredients that can irritate your skin, eyes, and respiratory system. They can even contribute to long-term health issues. Many “off the shelf” shower cleaners contain volatile organic compounds (VOCs) and other harsh chemicals like ammonia, bleach, and quaternary ammonium compounds. These substances can irritate the respiratory system, especially in individuals with asthma or other lung conditions. Regular exposure to these chemicals, especially in poorly ventilated spaces like bathrooms, can lead to chronic irreversible lung damage.
- Environmental Impact: When you rinse these cleaners away, they don’t just disappear when they go down the drain. They end up in our waterways, causing harm to aquatic life and the environment because waste water treatment plants aren't set up to remove environmental toxins.
So, say goodbye to the chemical waffle and embrace non-tox, natural alternatives. Your lungs (and the planet) will thank you!
Get natural cleaning tips from our blog!
We want you to have everything you need to clean your home healthier while avoiding unwanted chemicals – and looking out for the planet too! Take a browse through our blog and learn more about natural cleaning, safe ingredients and so much more!